- Enable navigation.instant, prefetch, progress, content.code.select, content.tabs.link
- Fix edit_uri (main→v2), copyright year (2024→2024-2026), consent banner config
- Add abbreviations glossary (47 acronyms with hover tooltips via snippets auto-append)
- Add tags to all 72 doc pages with consistent taxonomy (audience/module/type)
- Add status:new badges to 16 recent feature pages, search:boost to 7 entry pages
- Rewrite Architecture page with 5 Mermaid diagrams and full component documentation
- Rewrite Troubleshooting page from 5 to 13 sections with actionable checklists
- Fix broken links (Monitoring/Contributing pointed to blog placeholder)
- Expand Admin Guide roles table from 5 to 11 roles
- Create custom 404 page, blog with authors and inaugural v2 announcement post
- Fresh Playwright screenshots for login, dashboard, campaigns, users, settings, locations, shifts
- Remove 5 test/dev files and orphan template override
- Add planning document (DOCS_NEXT_STEPS.md) for future editorial reference

Bunker Admin
3.0 KiB
title, description, icon, tags, search
| title | description | icon | tags | search | |||||
|---|---|---|---|---|---|---|---|---|---|
| First Steps | Log in, explore the dashboard, and set up your first campaign and volunteer shift. | material/shoe-print |
|
|
First Steps
You've installed Changemaker Lite — here's what to do next.
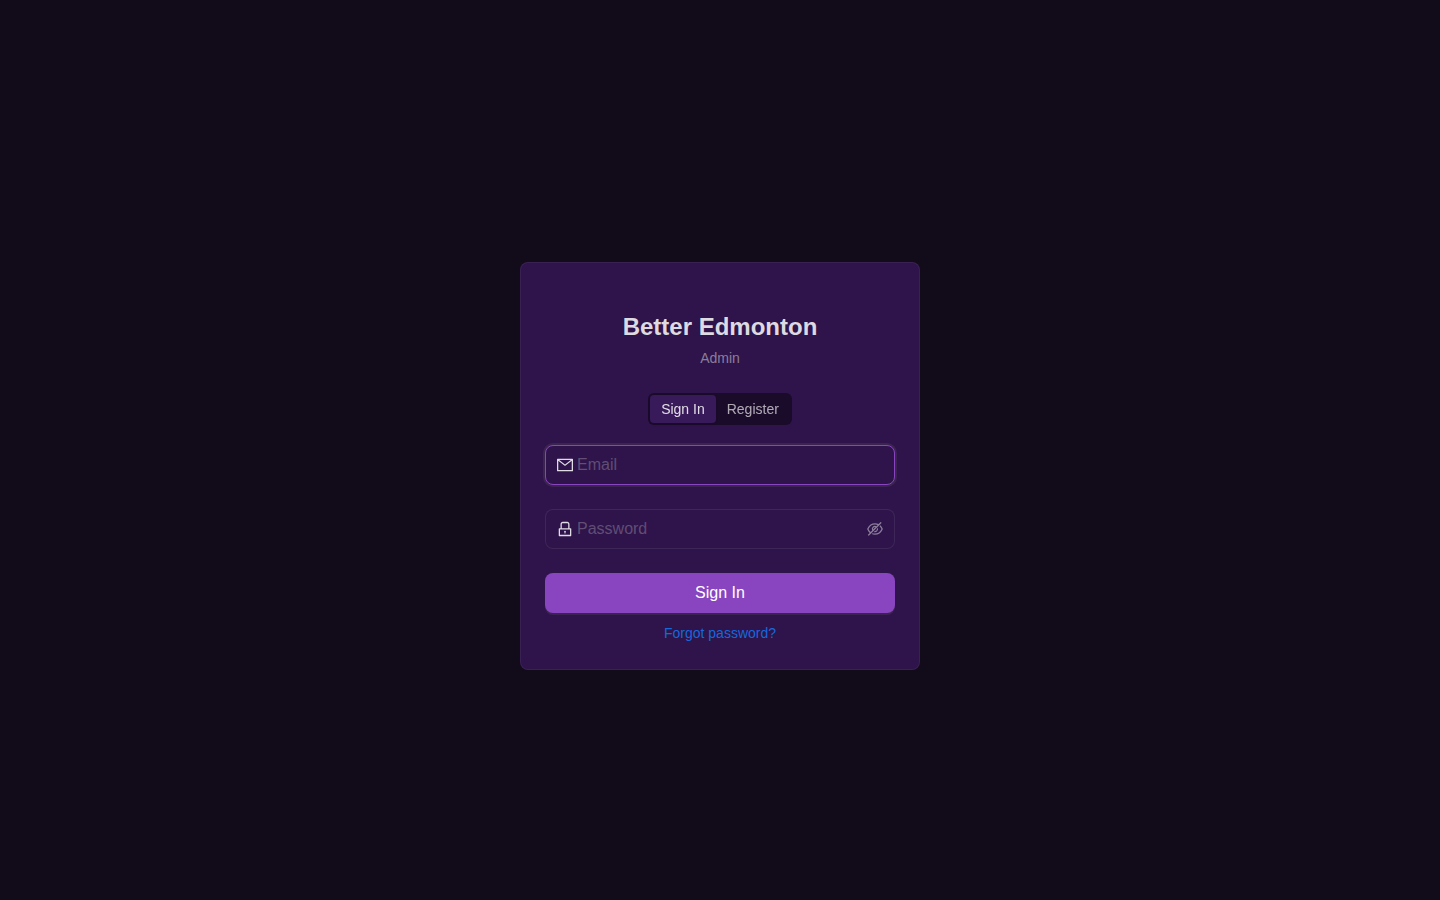
1. Log In
Open the admin panel at http://localhost:3000 (or app.DOMAIN in production) and sign in with the admin email and password you configured during setup.
 { loading=lazy }
!!! warning "Change your password" If you used the wizard's generated password, change it immediately from Settings > Organization.
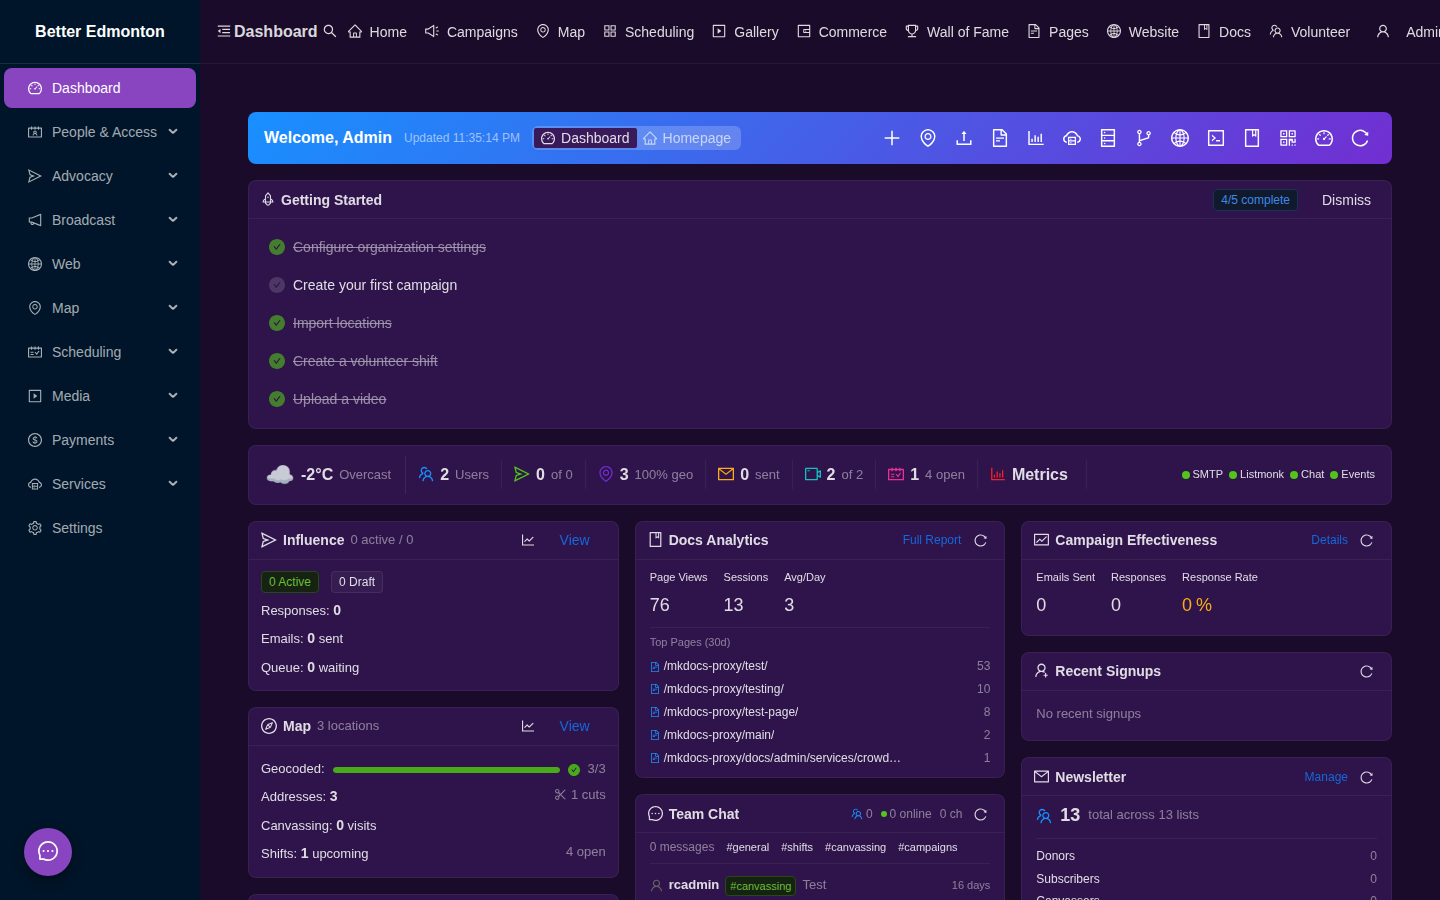
2. Explore the Dashboard
The dashboard gives you an at-a-glance view of platform activity. Initially it will be empty — that's normal.
 { loading=lazy }
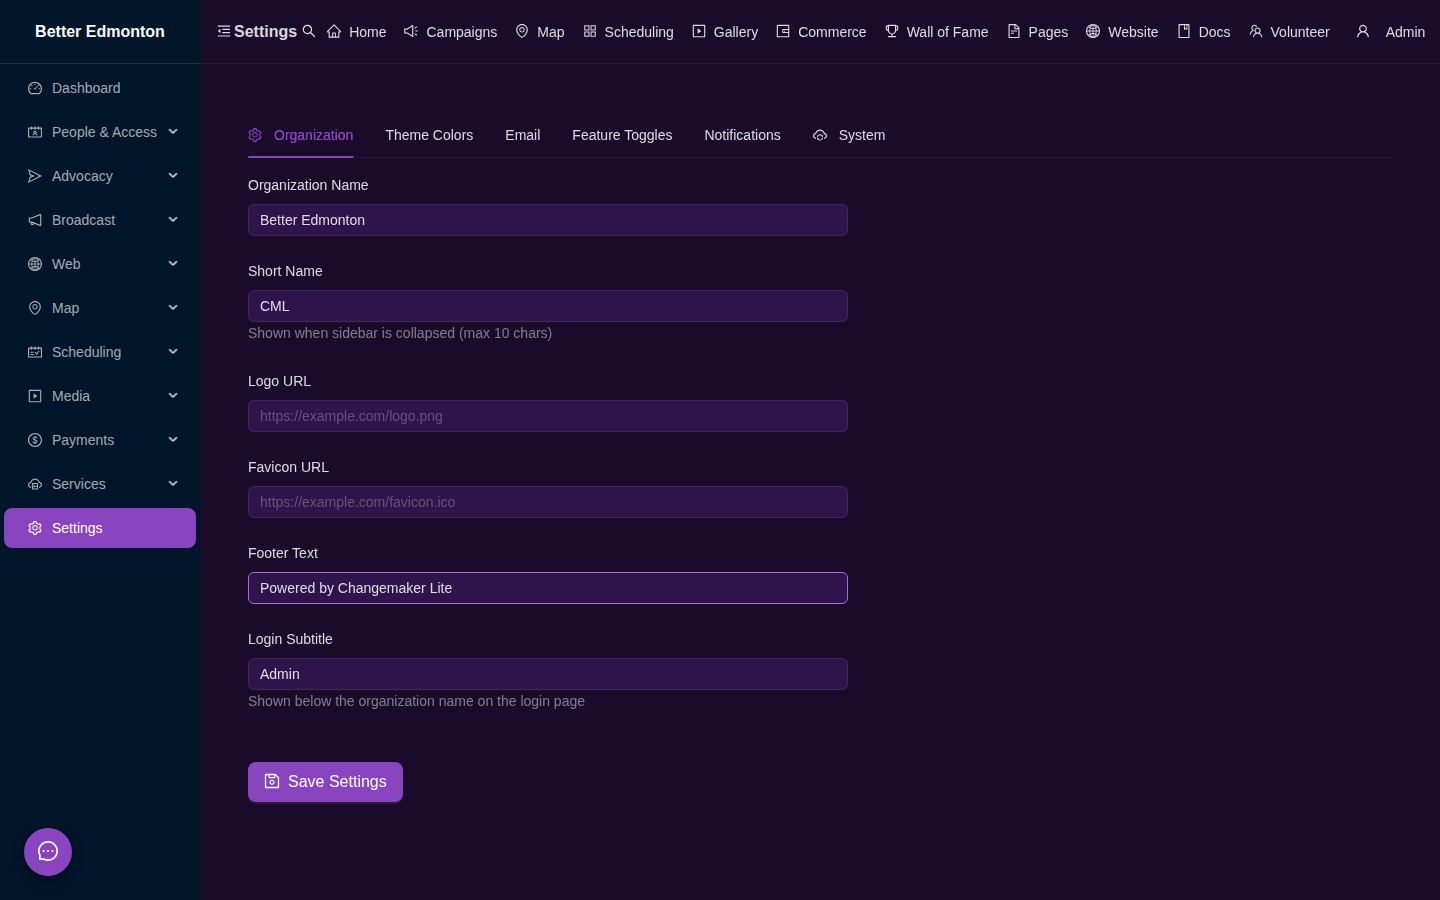
3. Configure Settings
Visit Settings (/app/settings) to:
- Set your organization name, logo, and tagline
- Choose theme colors for admin and public interfaces
- Enable feature modules (campaigns, map, media, payments, etc.)
- Configure email delivery (MailHog for testing, production SMTP for live use)
- Check the System tab to verify your installation and check for updates
 { loading=lazy }
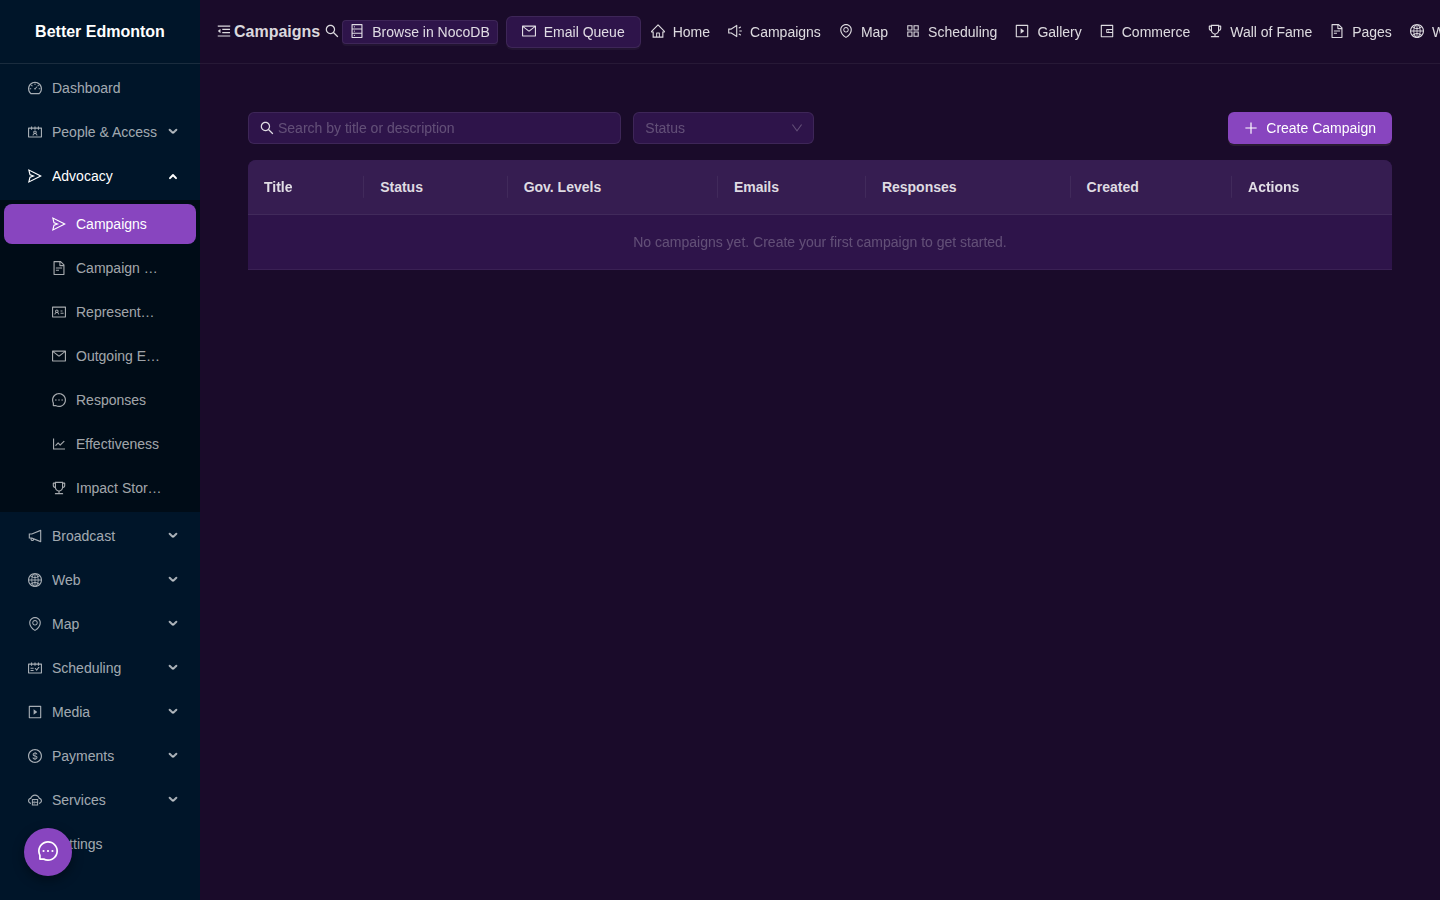
4. Create Your First Campaign
Go to Campaigns (/app/campaigns) and click Create Campaign:
- Write a title and description
- Compose the email template supporters will send
- Select government levels to target
- Publish — the campaign appears at
/campaigns
 { loading=lazy }
5. Add Locations
Go to Locations (/app/map) and add addresses:
- Click on the map to drop a marker
- Import a CSV of addresses
- Use the NAR (National Address Register) import for Canadian data
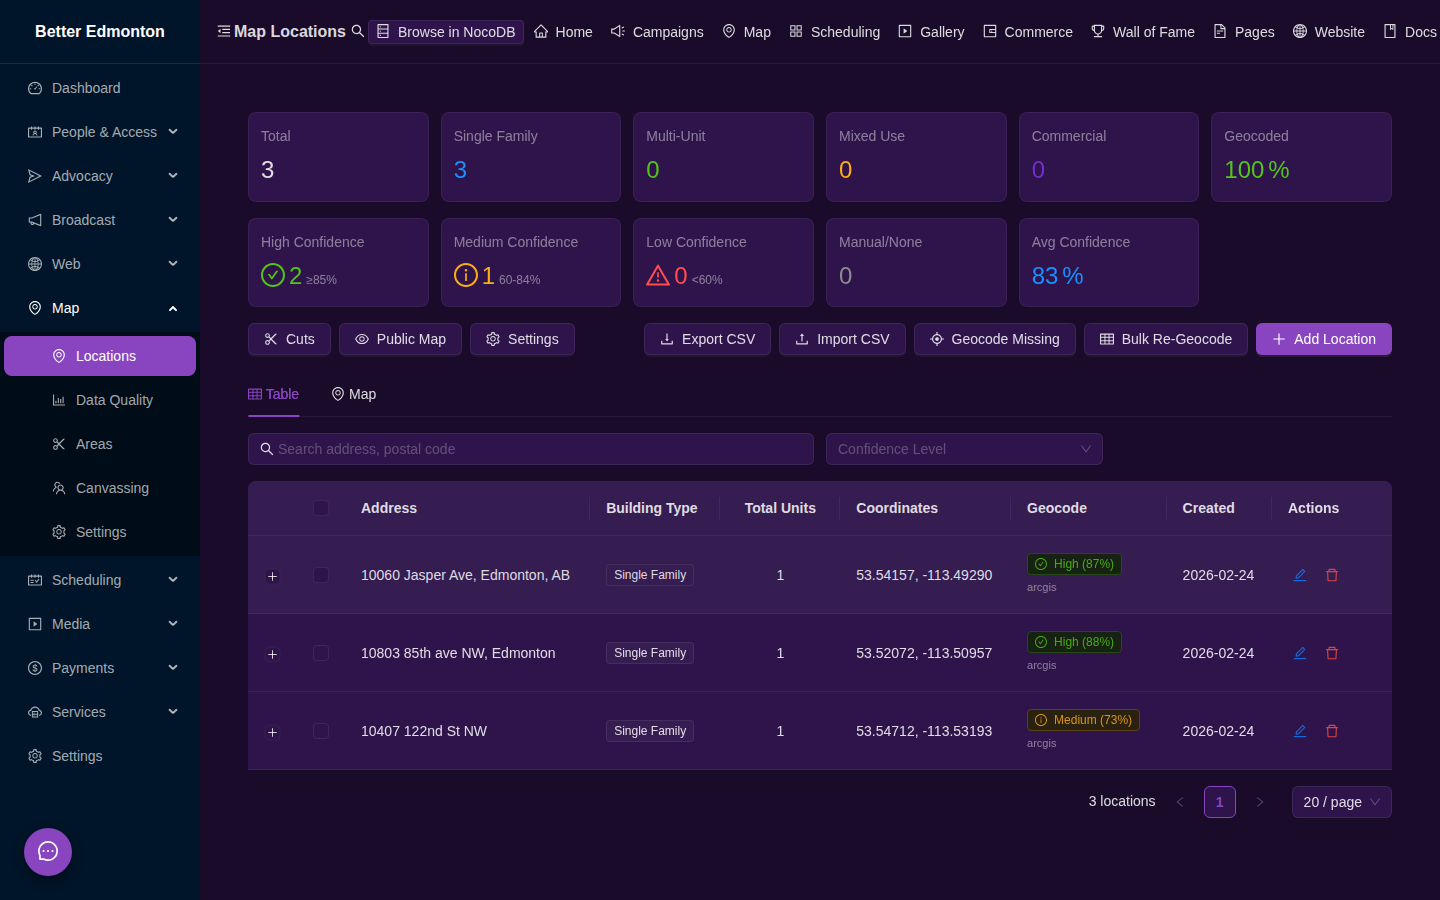 { loading=lazy }
6. Schedule a Shift
Go to Shifts (/app/map/shifts) and create your first volunteer shift:
- Set a date, time, and location description
- Optionally link it to a canvassing area
- Share the public shifts page (
/shifts) with volunteers
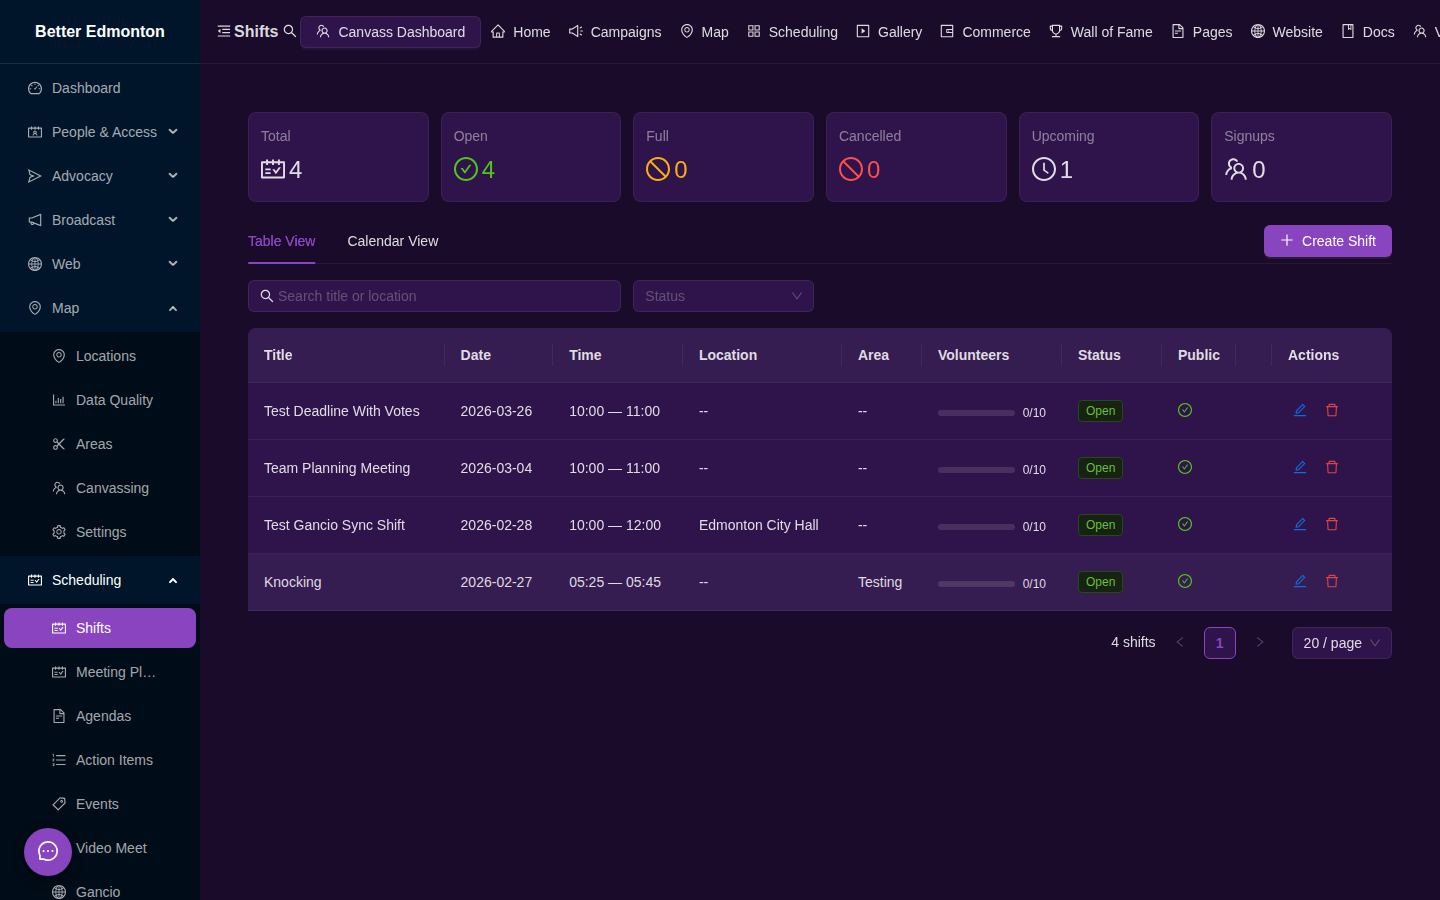 { loading=lazy }
7. Invite Volunteers
Share the shifts page link or generate QR codes for in-person events. Volunteers sign up with just an email address.
Next Steps
- Services Overview — complete catalog of all 30+ Docker services
- Updates & Upgrades — keep your installation current
- Features at a Glance — visual overview of every module
- Admin Guide — full administration reference
- Deployment — production setup with tunneling and SSL